Tutorial: How to run our Docker scan image from Azure DevOps pipelines
As you may know, we recently published on Docker Hub an image that you can run as a container which includes everything you need to scan your application with CAST Highlight’s analyzers without having to worry about the libraries you need to install, the compatibility of your OS, etc. One of the big advantages of Docker is that it’s now available from almost all popular CI/CD tools such as Jenkins, Bamboo, Azure DevOps, etc. In this tutorial, you’ll learn how to use our Docker image from Azure DevOps.
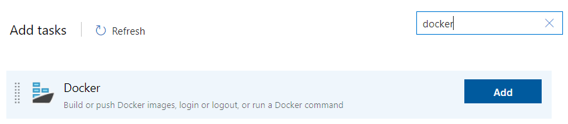
Everything starts at the level of pipelines in order to add a step dedicated to the CAST Highlight scan. Edit your pipeline and add a step. A panel opens on the right that lists all possible tasks you can add. Type ‘docker’ in the search field and add the ‘Docker’ task to include it into your pipeline.
Now that it is done, you can now configure your Docker task:
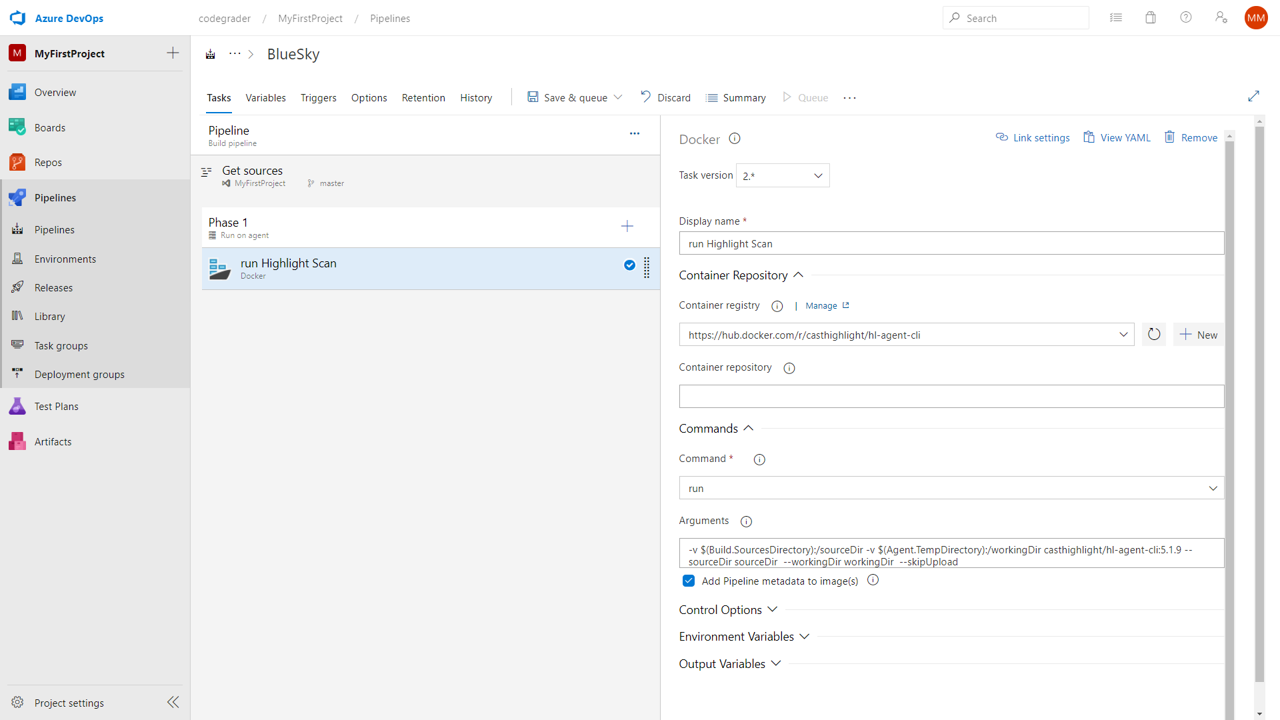
– Display name: give a name to your Docker task to easily retrieve it among other tasks
– Container registry: specify the url of CAST Highlight’s Docker image. The url is ‘https://hub.docker.com/r/casthighlight/cli’. You’ll need to have an active Docker Hub account and to pass your credentials
– Command: ‘run’ will be the sole command you need
– Arguments: typically, the options to be passed to the command line which is embedded into the Docker image.
As there are some subtleties due to Docker interactions with the file system where the source code is located (i.e. your Azure online agent), let’s see this part in more detail.
-v $(Build.SourcesDirectory):/here -v $(Agent.TempDirectory):/there casthighlight/cli:latest –sourceDir here –workingDir there –skipUpload
You can run Docker on most of operating systems such as Linux, Windows, MacOS, etc. In the meantime, the Docker image comes with its own embedded OS which has a different file system. Hence the need to map your local file system with the image file system. To do so, you’ll need to use the ‘-v’ (for ‘volume’) for each Highlight scan option where the file system is used. This is mainly the case for specifying the source directory (–sourceDir) and the working directory (–workingDir) where the scan results and log files will be produced. So, simply pass:
-v {your_local_directory}:/{docker_alias_for_this_directory}
These volumes must be defined prior to running the image per se (so that Docker will know and access the paths). Then, specify the image name (casthighlight/cli) and the version of the imshoage to be run as a container (separated by “:”).
Once these initial docker-specific settings are done, simply pass the rest of the Highlight CLI options you already know, making sure you used the defined Docker directory aliases for –sourceDir and –workingDir.
The final Docker command in your Azure DevOps step would look like this for an automated upload of the results to the CAST Highlight platform. You can easily use your defined pipeline variables in the Docker command with the $(syntax), mainly for the upload part (serverUrl, companyId, applicationId, user token).
-v $(Build.SourcesDirectory):/sourceDir -v $(Agent.TempDirectory):/workingDir casthighlight/cli:latest –sourceDir sourceDir –workingDir workingDir –serverUrl $(highlightInstanceUrl) –companyId $(highlightCompanyId) –applicationId $(highlightApplicationId) –tokenAuth $(highlightUserOAuthToken)
As I was not personally familiar with Docker – and if you’re in the same situation – I’d recommend you start with a simple CLI example (e.g. –help). It will help you progress step by step.
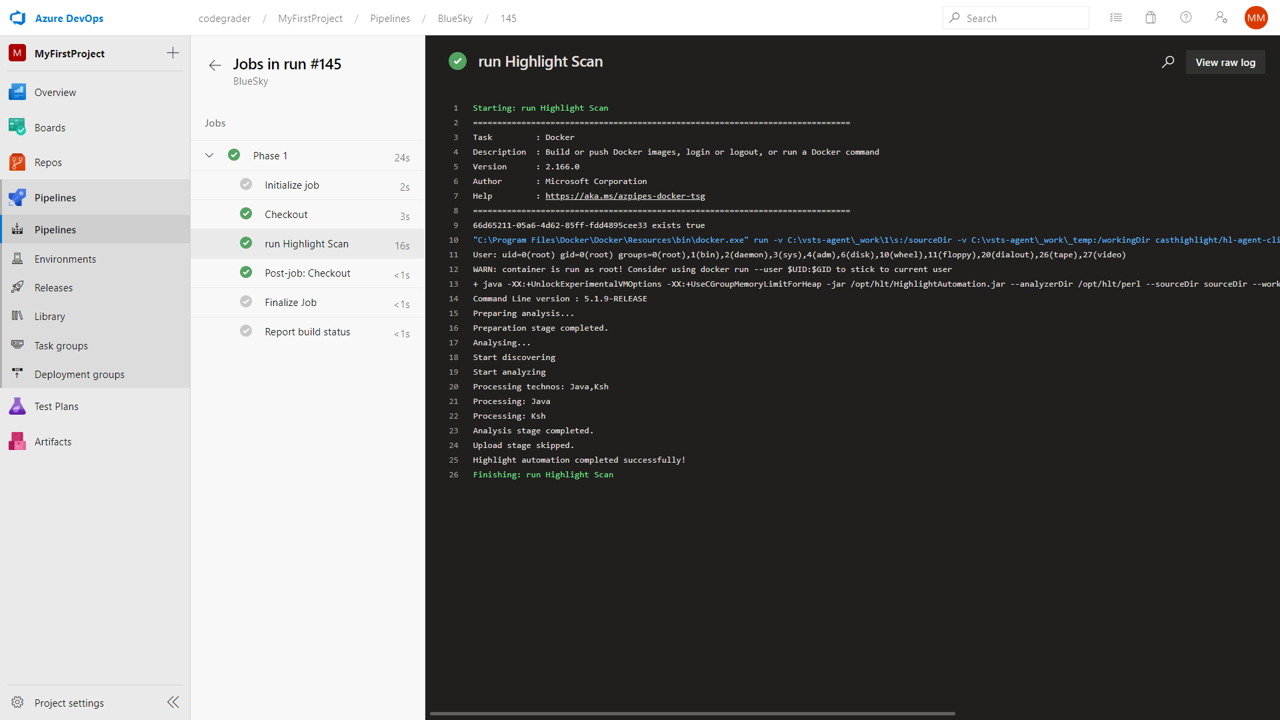
Finally, save your pipeline and run it!