Tutorial: How to build custom indicators using JIRA metrics and Highlight’s API
Let’s say you’re in the improbable situation where users of your apps/products are globally complaining about bugs that are not fixed within appropriate response time. Since you manage a portfolio of 500 apps, it’s not always simple to prioritize bug fixes appropriately and you often go full steam ahead on the most recent issue or on the application you perceive as being the most critical one at this specific point in time.
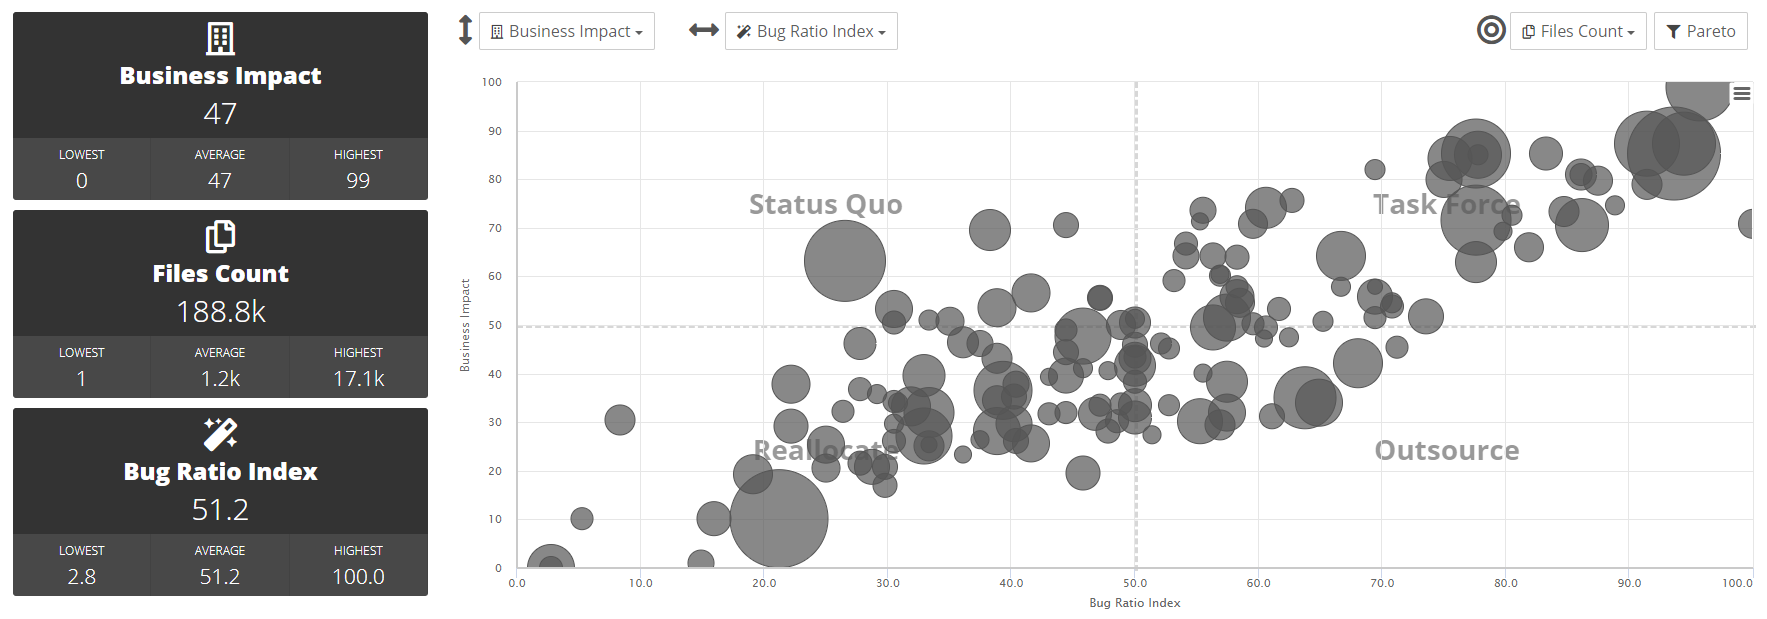
That said, you probably missed in your remediation shortlist some applications that are top critical to the business with recurring issues due to an unhealthy software code base. And you missed it as you lack a fact-based and objective view of your entire application landscape. At this stage, you would certainly dream of getting a clear visibility on how incidents, business impact and software complexity measures are distributed and eventually correlated, in order to set the ideal list of candidates to improve in high priority. And obviously, you don’t want to automate data gathering as you want to keep this list always up to date. The lines I wrote below are just for you!

STEP #1 – Create survey questions that will feed your custom indicator
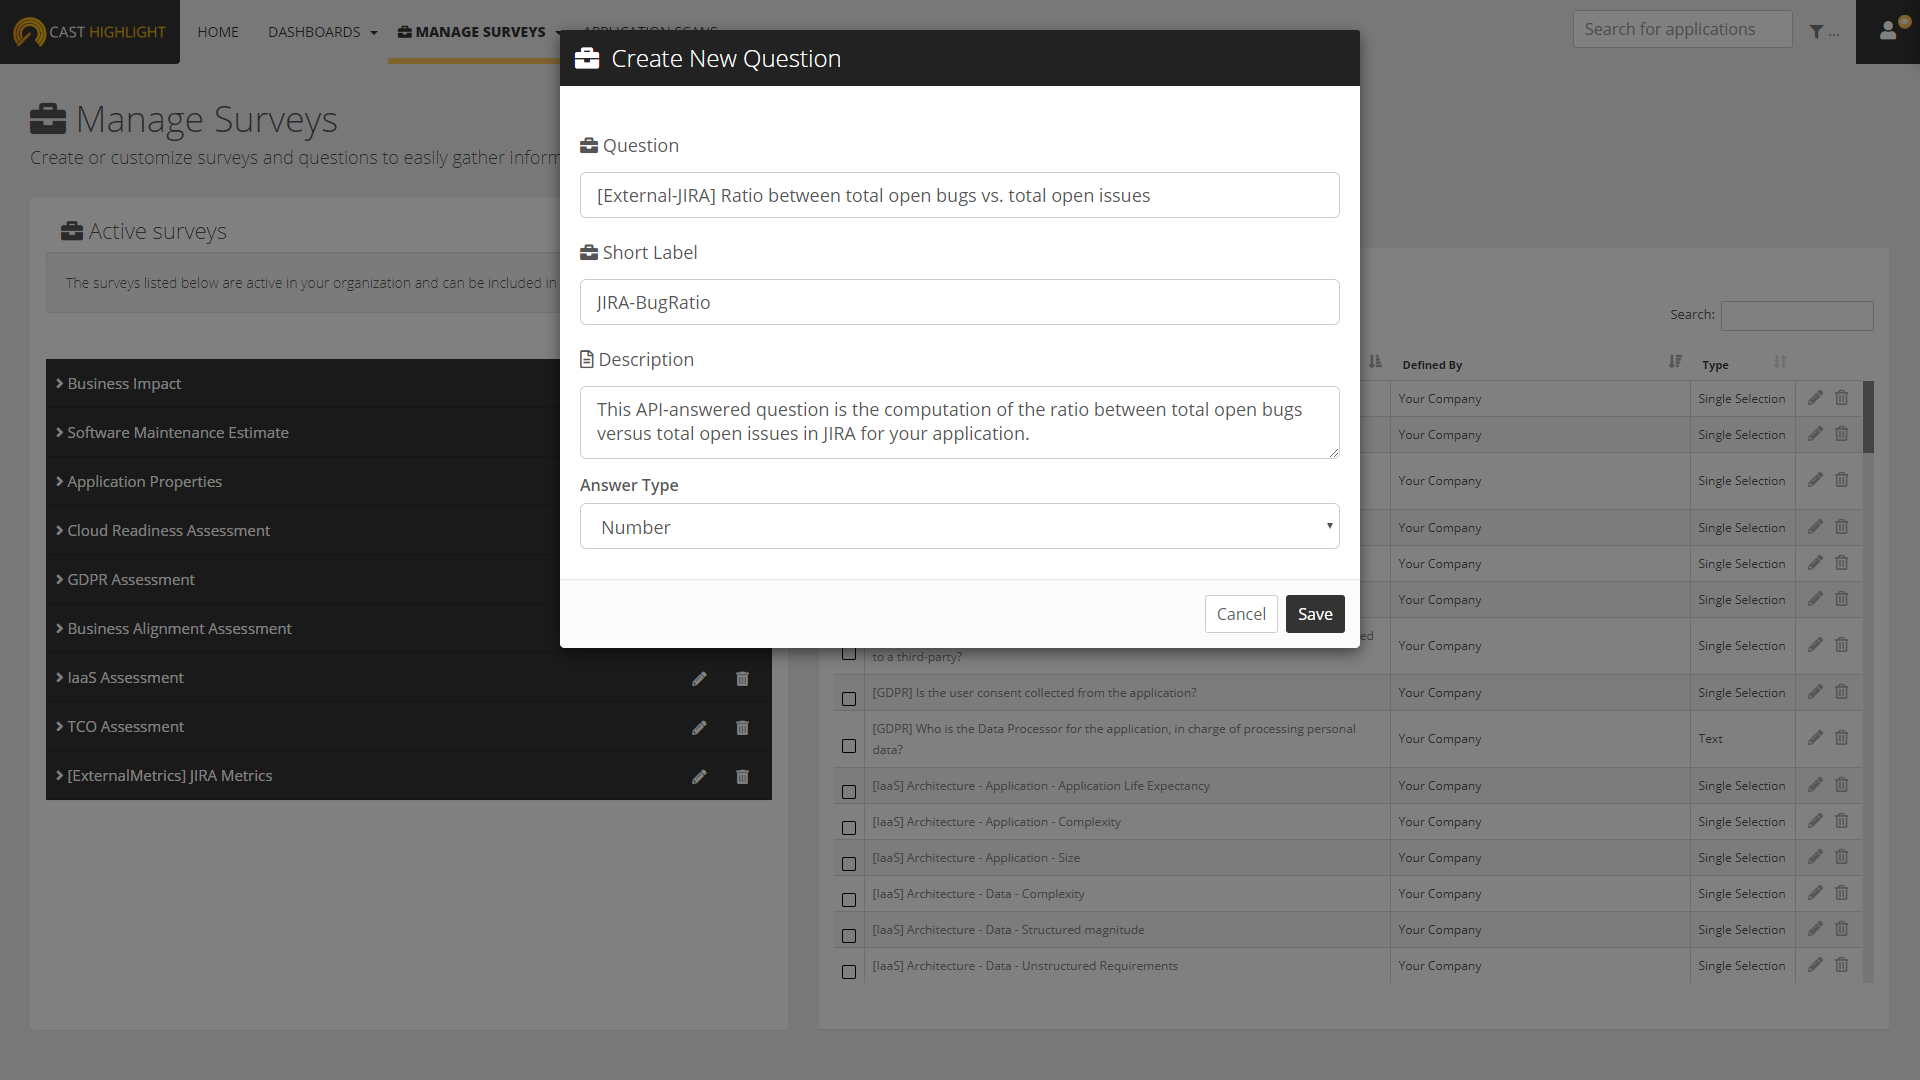
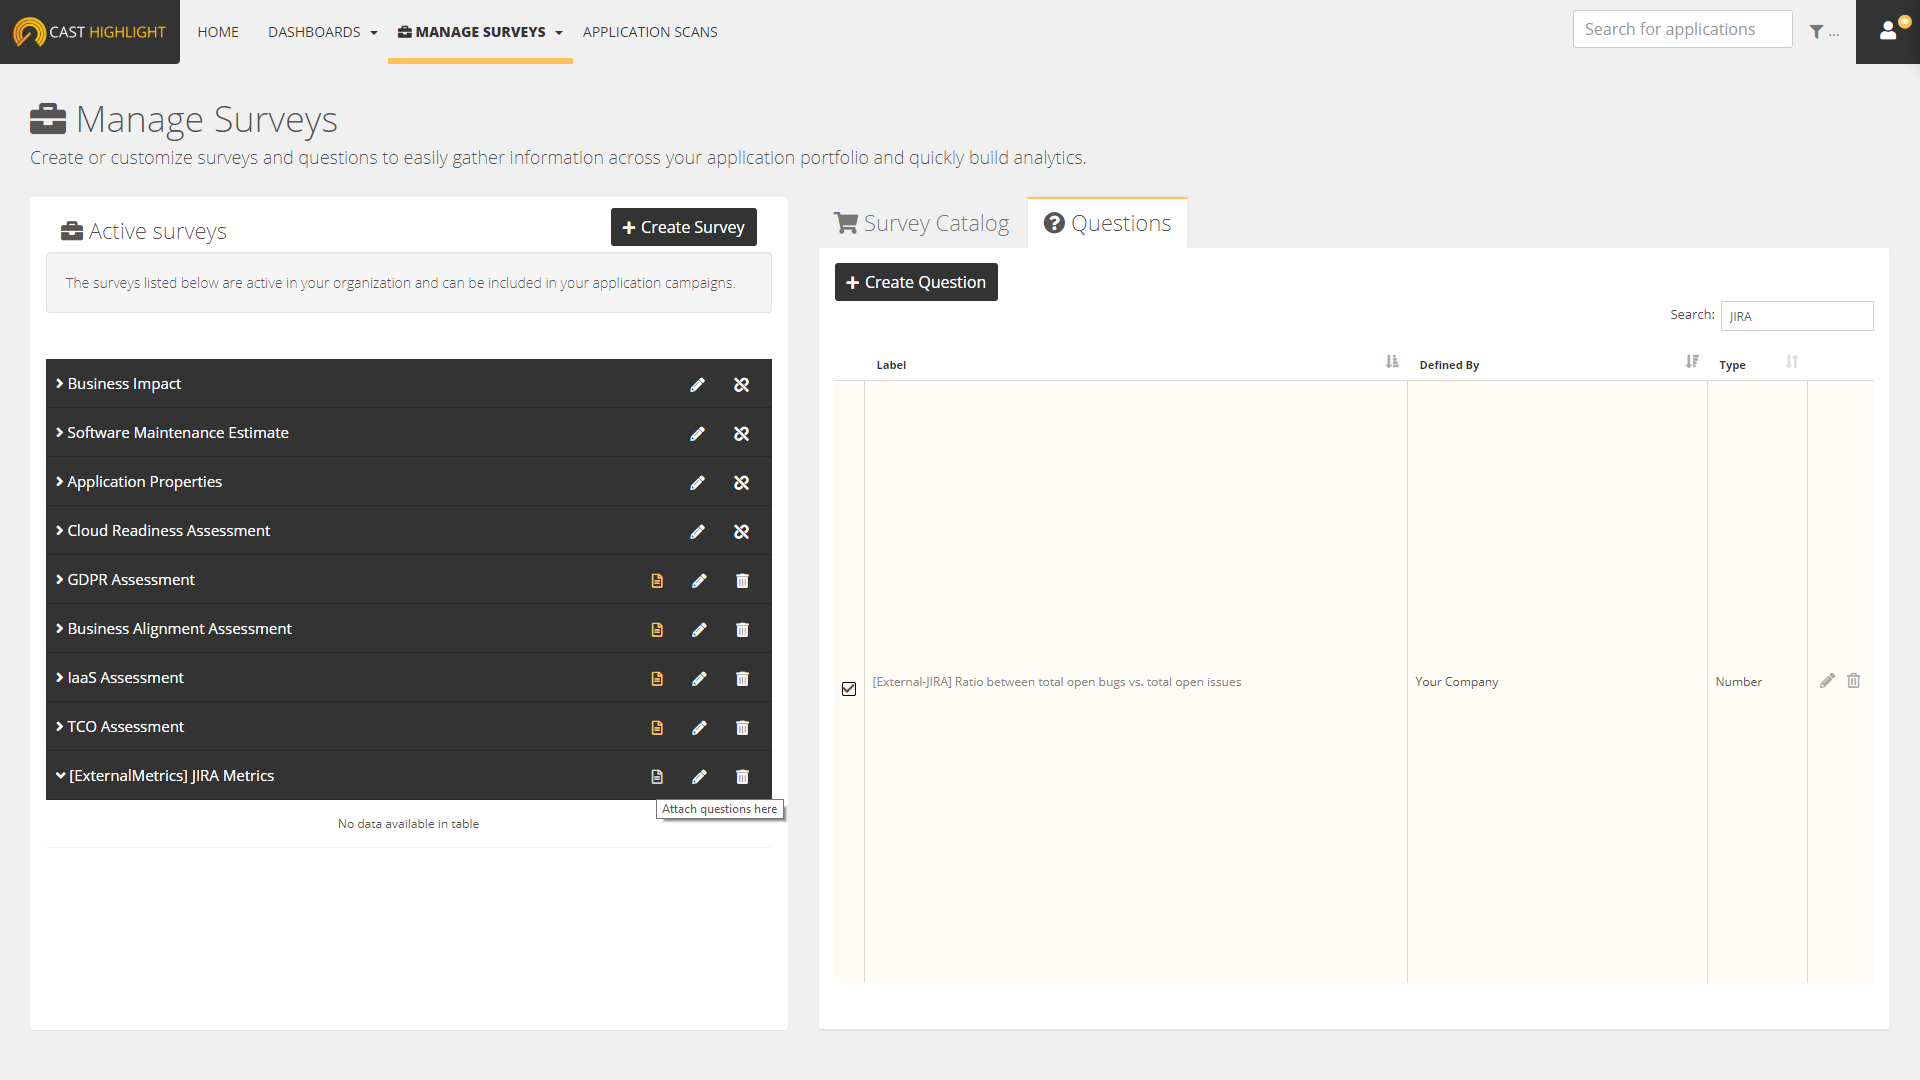
As a portfolio manager, you can create custom questions and surveys in Highlight. To do so, go to MANAGE PORTFOLIO > Manage Surveys. In our example, the custom indicator we’ll feed is quite simple and relies on one metric value that will be inserted in Highlight as a survey answer. If you want to build more sophisticated custom indicators, we recommend you to create a dedicated survey that groups these questions.
- Create a question with ‘number’ as the answer type.
- Create a survey and attach the created question to this survey.
- Get survey, question and answer identifiers through the API. This information will be needed later to automatically feed your custom indicator with external metrics that will be handled as survey answers.
The returned JSON will look like this:
“id”: 2244,
“name”: “[ExternalMetrics] JIRA Metrics”,
“questions”: [{
“id”: 10011303,
“label”: “[External-JIRA] Ratio between total open bugs vs. total open issues”,
“shortLabel”: “JIRA-BugRatio”,
“description”: “Ratio between the total number of open bugs and the total number of open issues in JIRA for the application/product.”,
“type”: “Number(9999.00)”
}]
}]
STEP #2 – Design your custom indicator
The next step is probably the most important one as it consists of interpreting answered values of your question to build a score from 0 out of 100 to your custom indicator. Generally speaking, in Highlight scores higher is the better. Let’s see a basic example. Through this custom indicator we’ll call the ‘Bug Ratio Index’, we want to capture the more or less important part of effort spent on fixing bugs rather than developing new features. In our context, a low bug ratio would mean that the situation is quite safe from a product quality standpoint, which will give a 100/100 in our indicator. Conversely, if all open tickets are bugs – and as a result the bug ratio is close to 1 – it means that the development team is essentially spending time fixing problems here and there rather than implementing new features that will bring direct value to your product. This extreme case will turn into a 0/100 score for our indicator.
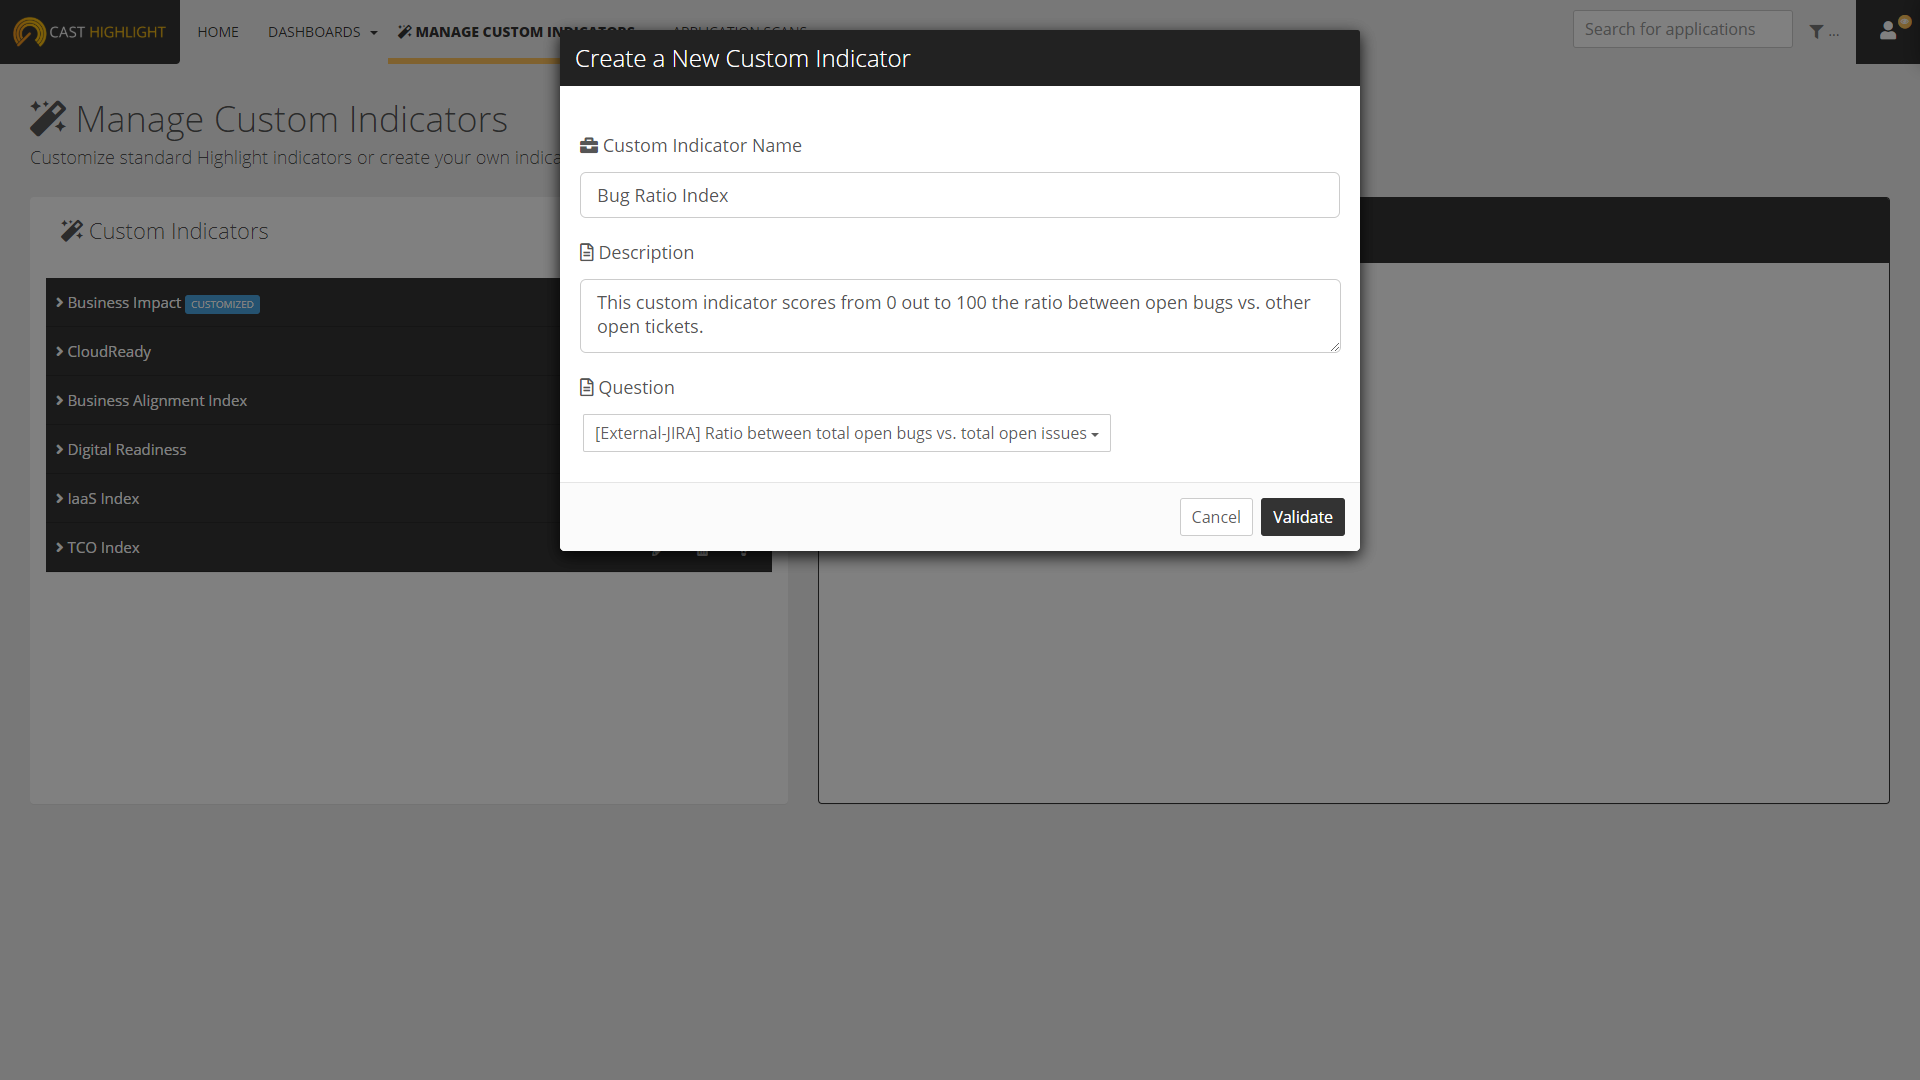
- Go to MANAGE PORTFOLIO > Manage Custom Indicators and create a new custom indicator
- Attach the question you just created
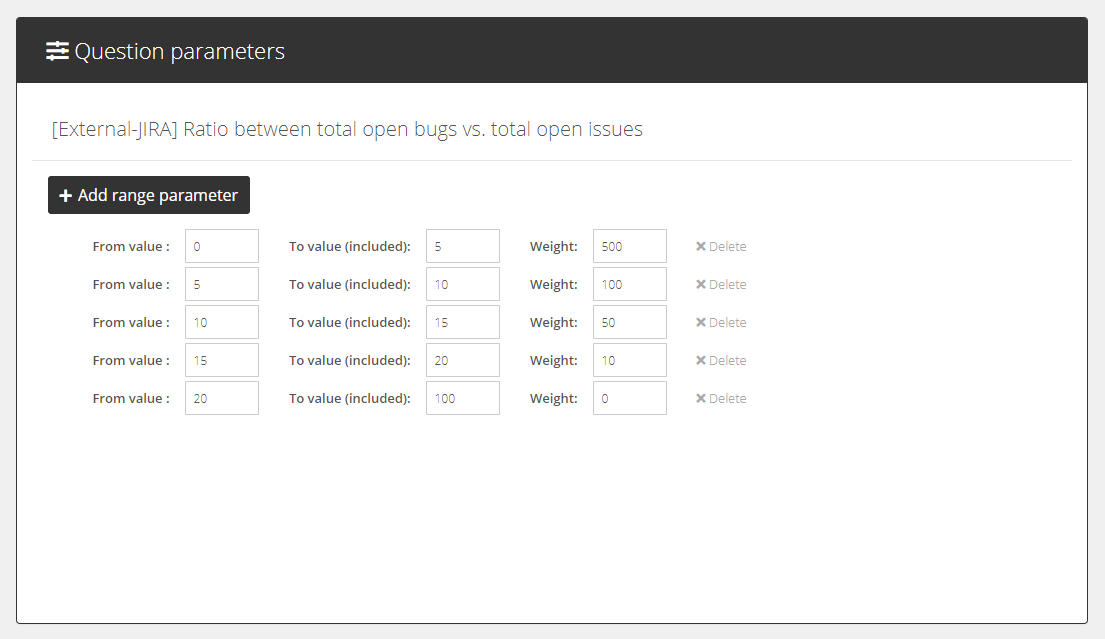
- Define the points given to each range of answered value
We could adopt a linear approach that consists of allocating the same number of points than the ratio you observe (i.e. bug ratio of 5%, 5 points are allocated; 15% gives 15 points, etc.) but a low sensitivity doesn’t help spot outliers across a portfolio. Instead, we’ll define kind of an exponential curve for point allocation that will numerically trigger an alert on specific thresholds. The design step is often underestimated as organizations generally jump on gathering data right away. They sometimes forget that an indicator must be actionable and design is a key step for that purpose.
The ranges of points below will be used to normalize metric values we’ll get from JIRA in order to compute a score from 0 out of 100.
- Set a range for a bug ratio from 0% to 5% => 500 points
- Set a range for a bug ratio from 5% to 10% => 100 points
- Set a range for a bug ratio from 10% to 15% => 50 points
- Set a range for a bug ratio from 15% to 20% => 10 points
- Set a range for a bug ratio above 20% => 0 points
- Click on the disk icon to save the configuration of your custom indicator
- The light bulb icon can be clicked to recompute all application scores for this indicator
STEP #3 – Create a campaign to collect survey answers
Now that our custom indicator is designed, it’s time to put in motion and start gathering metrics (i.e. survey answers) that will feed it. This can be done through the API.
In order to create the campaign, you’ll need your Highlight credentials (as a Portfolio Manager), the root domainId of your company portfolio, the survey ID that contains questions you just created and eventually the application IDs you want to include in this campaign. Don’t hesitate to look at our API online documentation to learn how to get application identifiers. In our example, we’ll include only one application (ID: 123456) in this campaign.
The BODY of your POST will look like this:
“name”: “JIRA-campaign”,
“closingDate”: “2019-07-31”,
“applications”: [{
“id”: 123456
}],
“surveys”: [{
“id”: 2244
}],
“status”: “started”,
“requestScan”: false,
“requestSurvey”: true,
“sendMessage”: “false”
}]
Below is the typical returned response from which you can catch the campaign ID you just created. This campaign identifier will be needed later to post the survey answer that contain your JIRA metrics.
“result”: [{
“id”: 33636,
“name”: “JIRA-campaign”,
“closingDate”: 1564459200000,
“status”: “started”,
“requestScan”: false,
“requestSurvey”: true,
“sendMessage”: false
}],
“error”: null
}
STEP #4 – Get ticket stats from JIRA’s API
This is now time to focus on the main step of this article: getting ticket stats from a JIRA instance in order to feed our custom indicator. We used JIRA as an example here, however any other third-party tool can be used as long as it has an API. As a result, this section is really specific to JIRA.
I’m not an expert in using JIRA’s API so I’ll be very basic and will perform two successive calls to get the two metrics that composes my Bug Ratio Index:
1. Get the number of open tickets from my project which have ‘bug’ as their type
“jql”: “project = ‘CAST Highlight’ and type = bug and status = ‘in progress'”,
“startAt”: 0,
“maxResults”: 50,
“fields”: [“id”]
}
JIRA’s API will return the JSON below. The “total” (4) value is the value we’re looking for.
“expand”: “names,schema”,
“startAt”: 0,
“maxResults”: 50,
“total”: 4,
“issues”: […]
}
2. Get the total number of open tickets from my project
“jql”: “project = ‘CAST Highlight’ and status = ‘in progress'”,
“startAt”: 0,
“maxResults”: 50,
“fields”: [“id”]
}
JIRA’s API will return the JSON below. The “total” (126) value is the value we’re looking for.
“expand”: “schema,names”,
“startAt”: 0,
“maxResults”: 50,
“total”: 126,
“issues”: […]
}
3. The ratio between open/all open tickets will be the value we’ll use for the survey
4/126*100 = 3.2
Here, we multiply by 100 and round for metric readability purpose. In this example, our application 123456 would receive a Bug Ratio Index of 100/100 as 3.2 is in the 0-5% range and will get 500 points (the maximum possible points for the custom indicator we designed in step #2).
STEP #5 – Answer the survey
Now, we need to programmatically answer the JIRA question we created through the API. We’ll use the questionId we got in the returned JSON at step #1 (10011303).
“questionId”: 10011303,
“value”: “3.2”
}]
STEP #6 – Submit the results
The final step is to submit the results for the application campaign which will automatically consolidate the custom indicator on the dashboard. You can skip this step in case you would like to manually review and eventually modify answers prior to submitting results.