Feature Focus: How to use Command Line’s .properties file
Why use .properties files with the command line
How to use a .properties file with the command line
You can also have multiple .properties files as templates in your repositories for the different scan use cases you may have (e.g., no-third-parties.properties, test-generate-local-results.properties, or simply highlight.properties).
Example:
> java -jar HighlightAutomation.jar --propertiesPath “C:\app\src\highlight.properties”
Sample .properties file
#################################################################
########### Highlight Automation Command Configuration ##########
#################################################################
######################## IMPORTANT NOTE #########################
# Any special characters (:,=,\,@) are escape in key and values #
# path=c:\\path #
# name=firstname\:john,lastname\=andrew #
# support.email=support\\@domain.com #
# hr\:email=hr\\@domain.com #
#################################################################
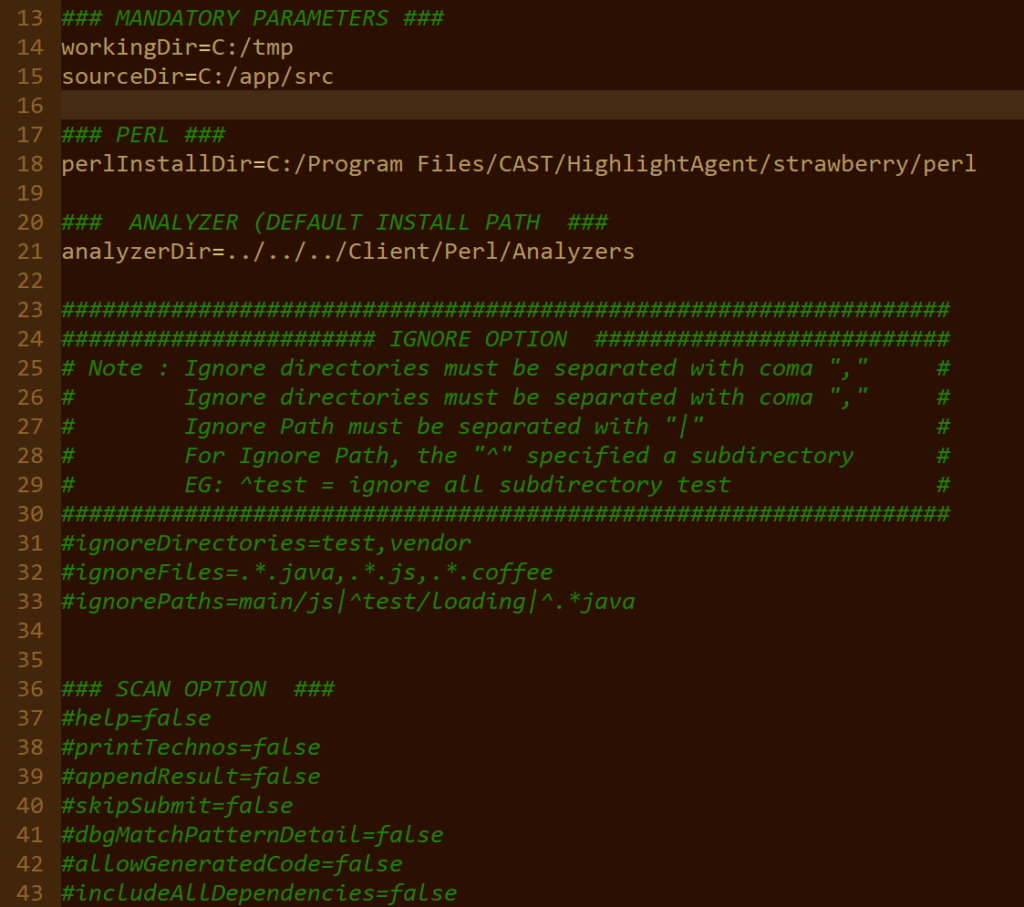
### MANDATORY PARAMETERS ###
workingDir=C:/tmp
sourceDir=C:/app/src### PERL ###
perlInstallDir=C:/Program Files/CAST/HighlightAgent/strawberry/perl
### ANALYZER (DEFAULT INSTALL PATH ###
analyzerDir=../../../Client/Perl/Analyzers
#################################################################
####################### IGNORE OPTION ###########################
# Note : Ignore directories must be separated with coma “,” #
# Ignore directories must be separated with coma “,” #
# Ignore Path must be separated with “|” #
# For Ignore Path, the “^” specified a subdirectory #
# EG: ^test = ignore all subdirectory test #
#################################################################
#ignoreDirectories=test,vendor
#ignoreFiles=.*.java,.*.js,.*.coffee
#ignorePaths=main/js|^test/loading|^.*java
### SCAN OPTION ###
#help=false
#printTechnos=false
#appendResult=false
#skipSubmit=false
#dbgMatchPatternDetail=false
#allowGeneratedCode=false
#includeAllDependencies=false
#analyzeBigFiles=false
#keywordScan
#zipResult
#technologies=Java,Python
#################################################################
####################### UPLOAD OPTION ###########################
# Note : You must set the skipUpload setting to false if you #
# want to use the upload options #
# You can find some examples below #
#################################################################
skipUpload=true
#login=john.doe\@acme.com
#password=*******
#basicAuth=bXlsb2dpbjpteXBhc3N3b3Jk
#tokenAuth=*******
#companyId=4
#applicationId=149901
#serverUrl=https://demo.casthighlight.com
#snapshotLabel=”My properties scan”
#snapshotDatetime
#uploadZipFile