Feature Focus: How to automatically generate a License Risk Profile based on the CAST Highlight license rulebook
Which license risk profile to use?
In CAST Highlight, Open Source components used by your applications are automatically detected with their licenses. Depending on the constraints, permissions, and other attributes of these licenses (i.e. license rulebook), CAST Highlight automatically determines a level of risk (high, medium, low) of using such a component within an application. While you can use the out-of-the-box license risk profile provided by CAST, you may also want to tweak it with some adjustments, or just start with a new License Risk profile from scratch by applying your own license policy.
License risk profile management in CAST Highlight is very flexible and can be used by root-level Portfolio Managers in several ways:
- The default license risk profile is designed to identify common license risks for a typical application developed by commercial organizations. This article explains how this license risk profile is built. If you’re unsure about a specific license or risk categorization, we recommend you consult with an open source legal expert.
- You can create your own license risk profile from CAST Highlight’s user interface (Manage License Profiles) by manually determining the level of risk (high, medium, low) for each license.
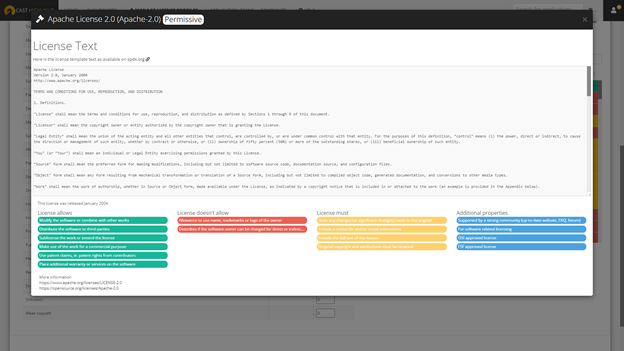
- You can use the license rulebook to automatically determine the level of risk for each license based on each licenses’ properties and terms (e.g. must disclose source code, permissive vs. strong copyleft, etc.). See how this is done in the next section of this article.
How to create a license risk profile based on the license rulebook
Now, let’s see how to quickly create a license risk profile based on the license rulebook.


- A positive score indicates that the license property decreases the license risk (e.g., CAN distribute the software to third parties)
- A negative score indicates it increases the license risk (e.g., Strong copyleft)
Portfolio Managers can customize the number of points allocated to each element of the rulebook.
These points are automatically summed up at the license level while you’re editing the rulebook configuration. For example, the BDS Zero Clause license has 12 points, which indicates that it is a license which is way more permissive than GNU Affero GPL 3.0 which has -13 points.
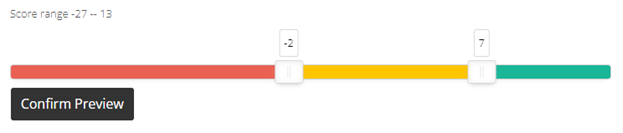
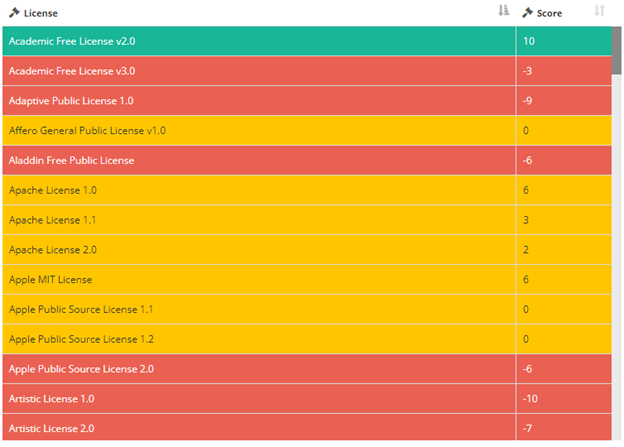
You can then adjust the license score thresholds to automatically determine the level of risk of licenses (high risk/red, medium risk/yellow, low risk/green), by dragging the threshold sliders.
In the example below, all licenses having a score below -2 points will be categorized as high risk (red). All license above -2 points and below 7 points will be categorized as medium risk (yellow). Finally, all licenses above 7 points will be categorized as low risk (green).
Finally, click on “Save” at the bottom of the screen to save your license risk profile. Your new license risk profile appears in the list on the left part of the screen.
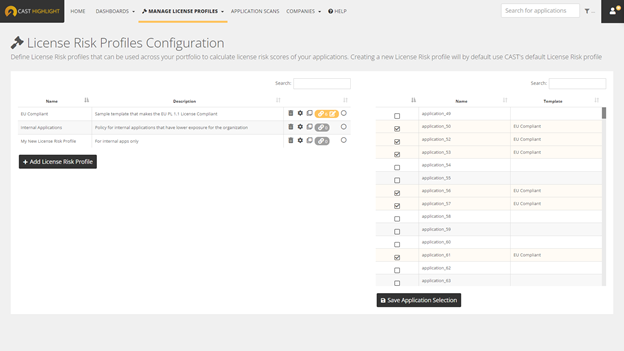
How to roll out license risk profiles across your portfolio
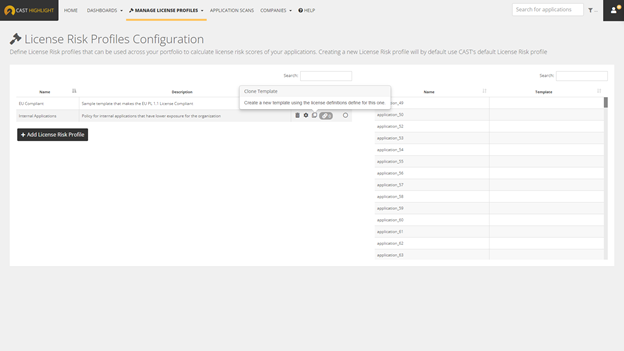
From here, you can edit, delete, or even duplicate an existing license risk profile by clicking on the different icons, but you can also define how these profiles will be applied across your application portfolio.

- Apply a default license risk profile: to make a specific license risk profile the one that will be applied by default to all applications, check the radio button on the right. All licenses found in existing applications will be categorized according to this profile, future onboarded applications will also be scored according to this license risk profile.
- Apply a specific license risk profile to specific applications: depending on the context of an application (might be SaaS or internal application, or perhaps an Open Source project), you may want to apply a specific license risk profile to it. For this, click on the “chain” icon, then select the applications from the right table to apply this profile to them and finally click on “Save Application Selection”.